Lesson 1
Getting Started
This lesson covers:
- Opening a terminal window
- Launching Jupyter notebook
- Running IPython in a Terminal
- Running IPython in Jupyter QtConsole
- Executing a standalone Python file in IPython
- Optional
- Jupyter notebooks in VSCode
- Jupyter notebooks in PyCharm Professional
Opening an Anaconda Terminal
An Anaconda terminal allows python to be run directly. It also allows other useful programs, for example pip, the Python package manager to be used to install packages that are not available through Anaconda.
Windows
Launch Anaconda Prompt from the start menu.
OSX and Linux
Open the terminal (instructions depend on your distribution). If you allowed conda to initialize, then you should be ready to call Anaconda"s python and supporting functions. If not, you should
cd ~/anaconda3/bin
./conda init
and then reopen your terminal.
Running IPython in a Terminal
- Open a terminal.
- Run IPython by entering
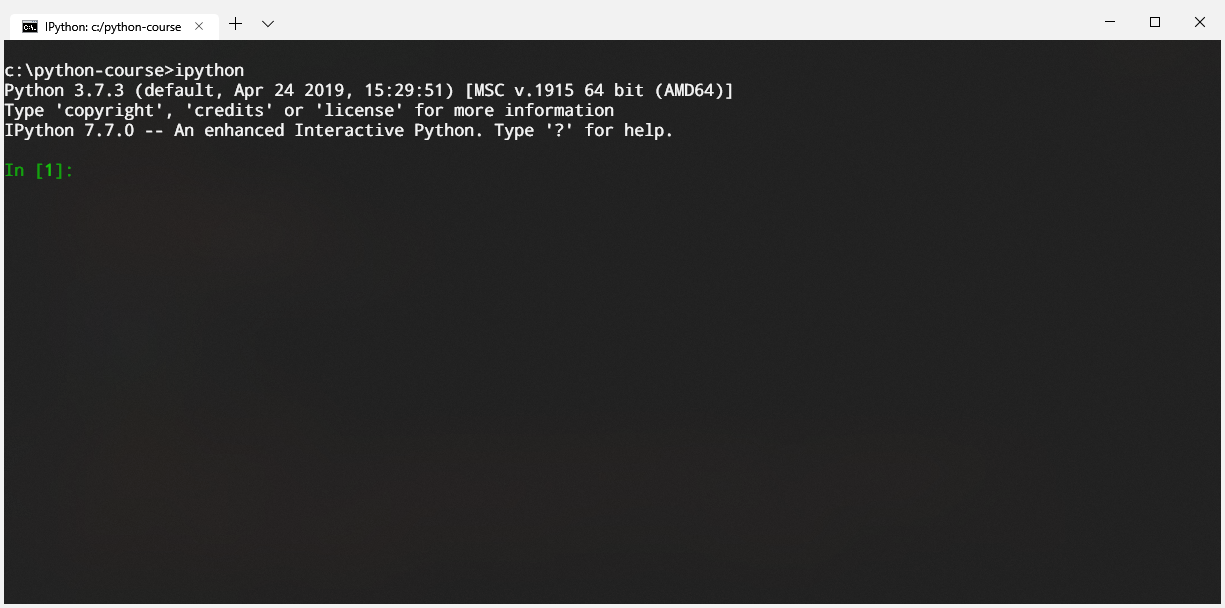
ipythonin the terminal window. You should see a window like the one below with the iconicIn [1]indicating that you are at the start of a new IPython session.
Launching Jupyter notebook
- Launch Jupyter Notebook from the Start Menu or launcher.
- Change directory to the location where you store your notebooks.

Executing a standalone Python file in IPython
- Open a text editor and enter the following lines. Save the file as lesson-2.py. Note that Python is white-space sensitive, and so these lines should not not indented.
from math import exp, log

x = exp(1)
y = log(x)

print(f"exp(1)={x}, log(exp(1))={y}")
- Run the code in an IPython session using
%run -i lesson-2.py. Note: you should create the python file in the same directory as the notebook.
If everything works as expected, you should see
exp(1)=2.718281828459045, log(exp(1))=1.0
Jupyter notebooks in VSCode
Visual Studio Code (or VS Code) is a lightweight IDE that supports adding features through extensions. The key extension for working with notebooks is Python extension for Visual Studio Code. With this extension installed, VS code provides native support for Jupyter notebooks.
- Install VS Code and the Python extension
- Open the command palette and enter "create jupyter" and select the only available item.
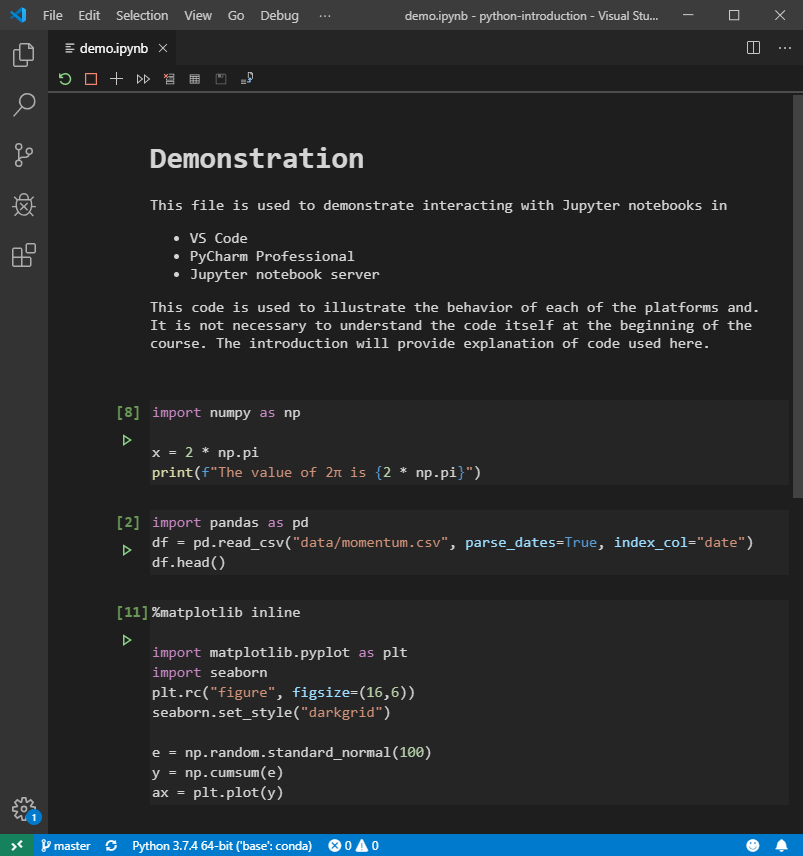
See the screenshot below for an example of the experience of using Jupyter notebooks in VS Code.
Magic Python in VSCode
Visual Studio Code supports Magic Python mode in standard Python files that can be executed cell-by-cell.
-
Install VS Code and the Python extension
-
Select File, New and then save your file with the extension .py (e.g., file.py).
-
This is a Python file that supports a cell demarcation using
#%%for code cells and#%% [markdown]for cells that contain markdown code. Note that markdown text must be either:- Surrounded by triple quotes, e.g.
"""markdown text"""or"""markdown text"""; e.g.,
"""
# Cell Heading

Likeness darkness. That give brought creeping. Doesn"t may. Fruit kind
midst seed. Creature, let under created void god to. Them day was Was
creature set it from. Fourth. Created don"t man. Man. Light fourth
light given the he image first multiply after deep she"d great. Morning
likeness very have give also fowl third land beast from moving thing
creepeth herb creeping won"t fifth. Us bring was our beast wherein our
void and green he fruit kind upon a given, saying fruit, moveth face
forth. His you it. Good beginning hath.
"""
- Or commented
#(with a single space) at the start of each line,
# # Cell Heading
#
# Likeness darkness. That give brought creeping. Doesn"t may. Fruit kind
# midst seed. Creature, let under created void god to. Them day was Was
# creature set it from. Fourth. Created don"t man. Man. Light fourth
# light given the he image first multiply after deep she"d great. Morning
# likeness very have give also fowl third land beast from moving thing
# creepeth herb creeping won"t fifth. Us bring was our beast wherein our
# void and green he fruit kind upon a given, saying fruit, moveth face
# forth. His you it. Good beginning hath.
- Surrounded by triple quotes, e.g.
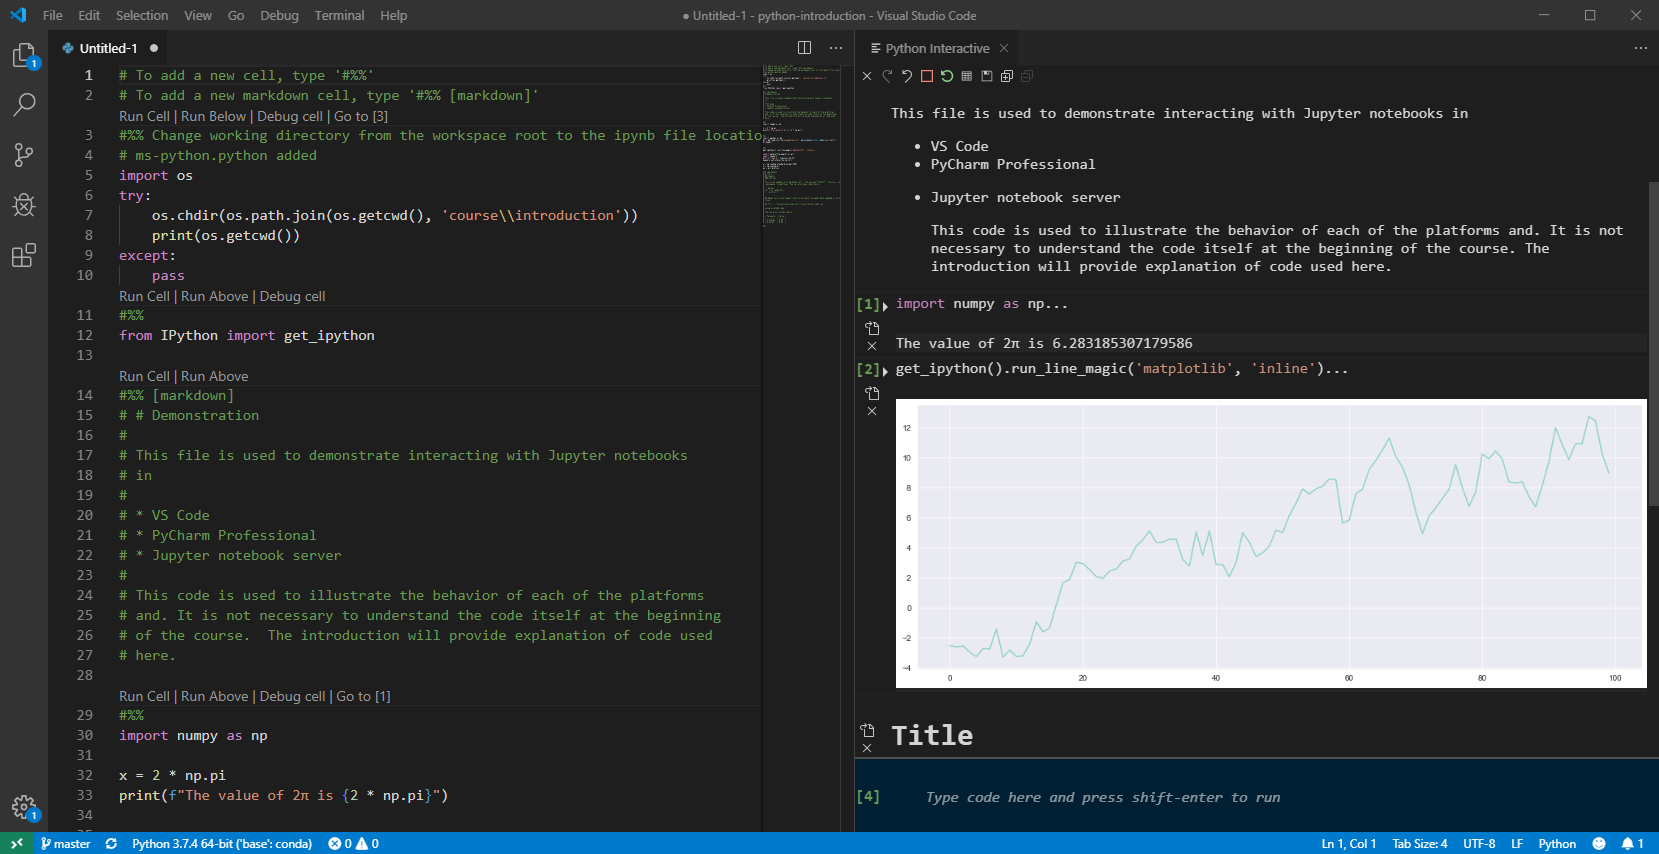
The cells have a special button above them that allows the contents to be executed and the result to be displayed in the interactive window. See the screenshot below for an example of the experience of using VS Code. There is also an interactive console at the bottom left where commands can be directly executed.
Importing an exiting notebook into Magic Python
VS Code only understands Magic Python files as notebook-like documents, and so .ipynb files must be converted to use. The process of importing is simple:
- Open a Jupyter notebook file
- Click on Import in the popup that appears.

Exporting Magic Python to a Jupyter notebook
To export a Magic Python file, open the command palette and enter "import jupyter". Select the option to import the notebook.

Jupyter notebooks in PyCharm Professional
PyCharm Professional has deeply integrated Jupyter Notebooks. To create an IPython notebook:
- Open PyCharm Profession
- Open the directory where your notebooks are stored
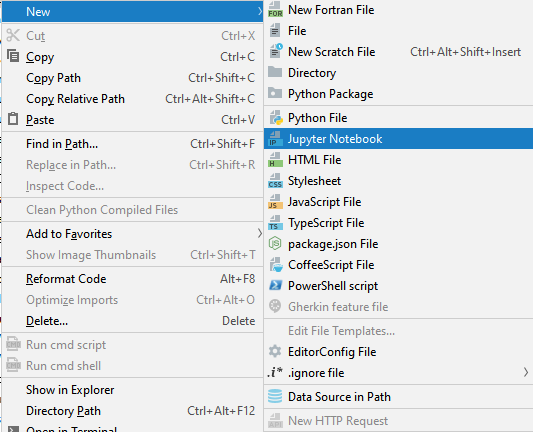
- Right-click on the root directory and select
New > Jupyter Notebook. Give your file a meaningful name, and it will open in the main window.
PyCharm uses a special syntax where cells look like code and so can be edited like text. This allows PyCharm to use introspection and code completion on the code you have written, a highly useful set of features. PyCharm stores the notebook in a Jupyter notebook file (.ipynb), which means that you can trivially open it in any other Jupyter notebook aware app. This differs from VS code which stores the file as a play Python file (.py) and requires an explicit export to a Jupyter notebook file.
A code cell is demarcated using #%% and a markdown cell begins with #%% md. Below is a screenshot of this notebook in PyCharm.
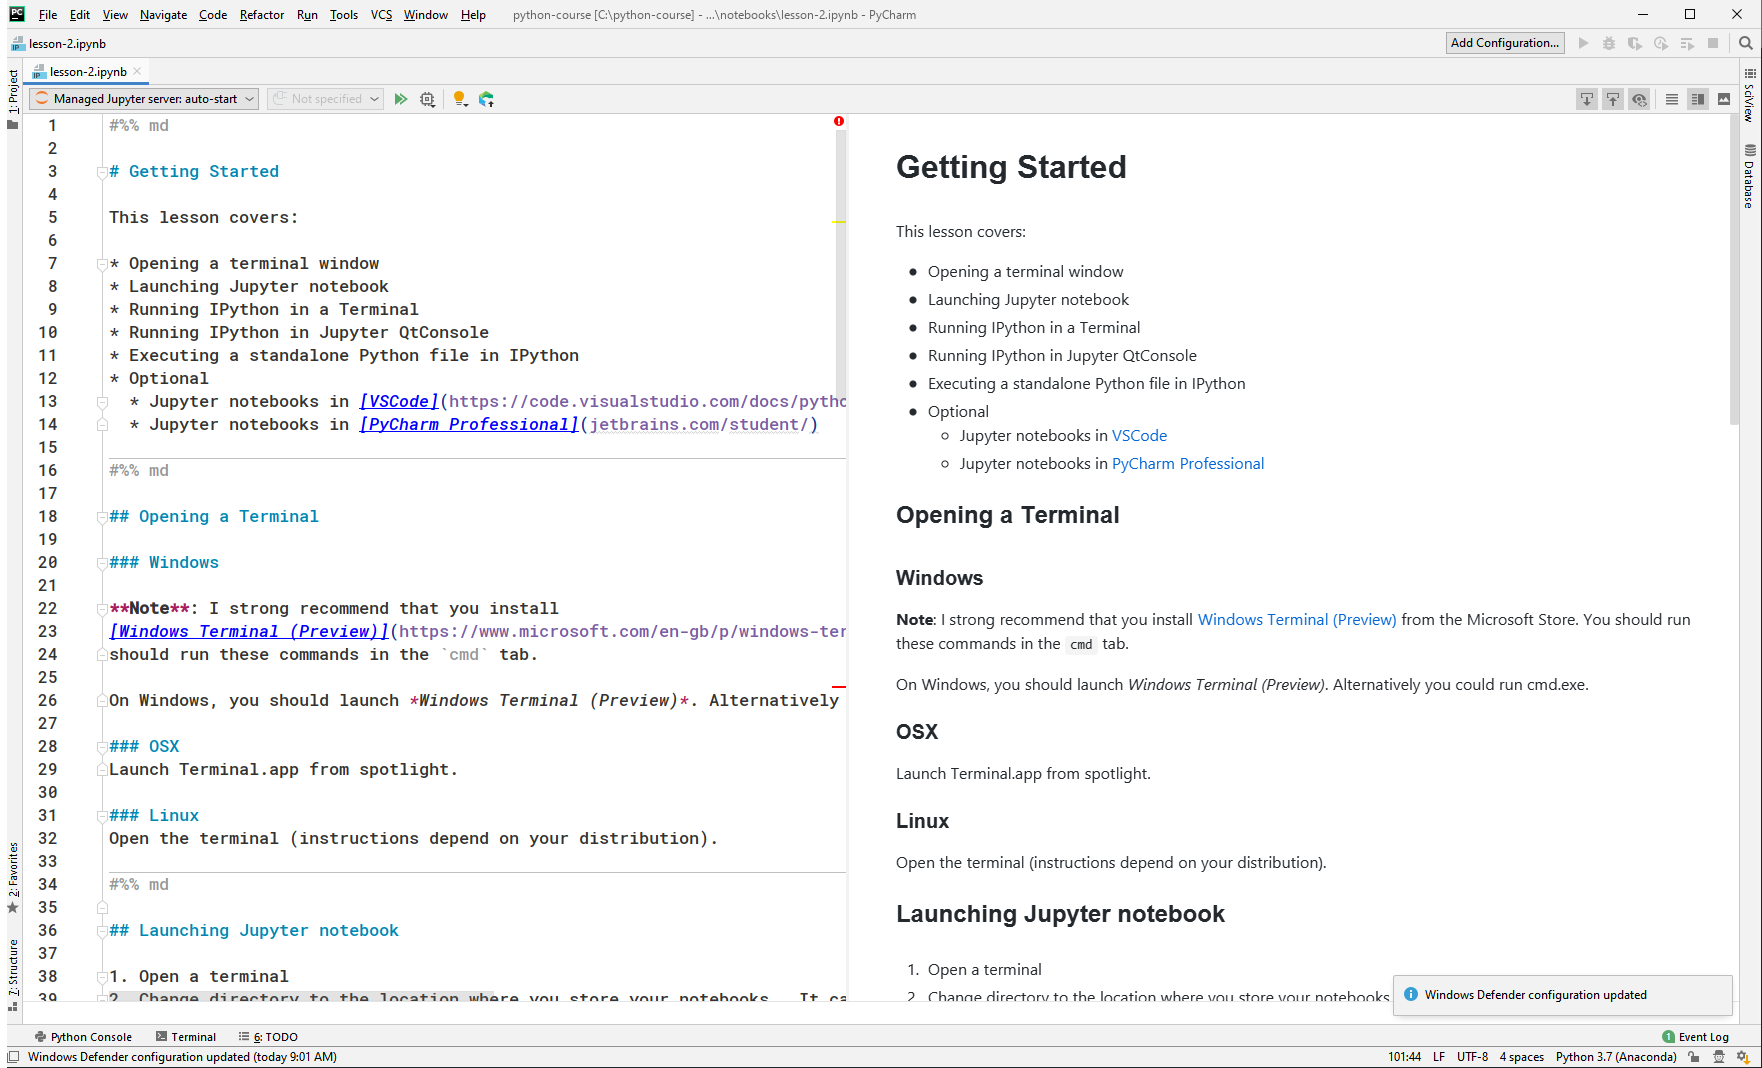
Magic Python in PyCharm
PyCharm supports Magic Python cell execution. To use Magic Python, you need to enable Scientific Mode in the View menu. You can then use #%% to indicate the start and end of cells. Individual Cells can be executed in the console by pressing CTRL+Enter.
-
In PyCharm, right-click on the root directory and select
New > Python File. Give your file a meaningful name. -
Enter
#%%
print("This is the first cell")

#%%
print("This is not executed when the first cell is run")
-
Enable Scientific Mode in the View menu.
-
Run the first cell by placing you mouse in the cell and pressing CTRL+Enter.
-
Run the second cell by clicking on the Play button (arrow) that appears in the gutter of the editor.